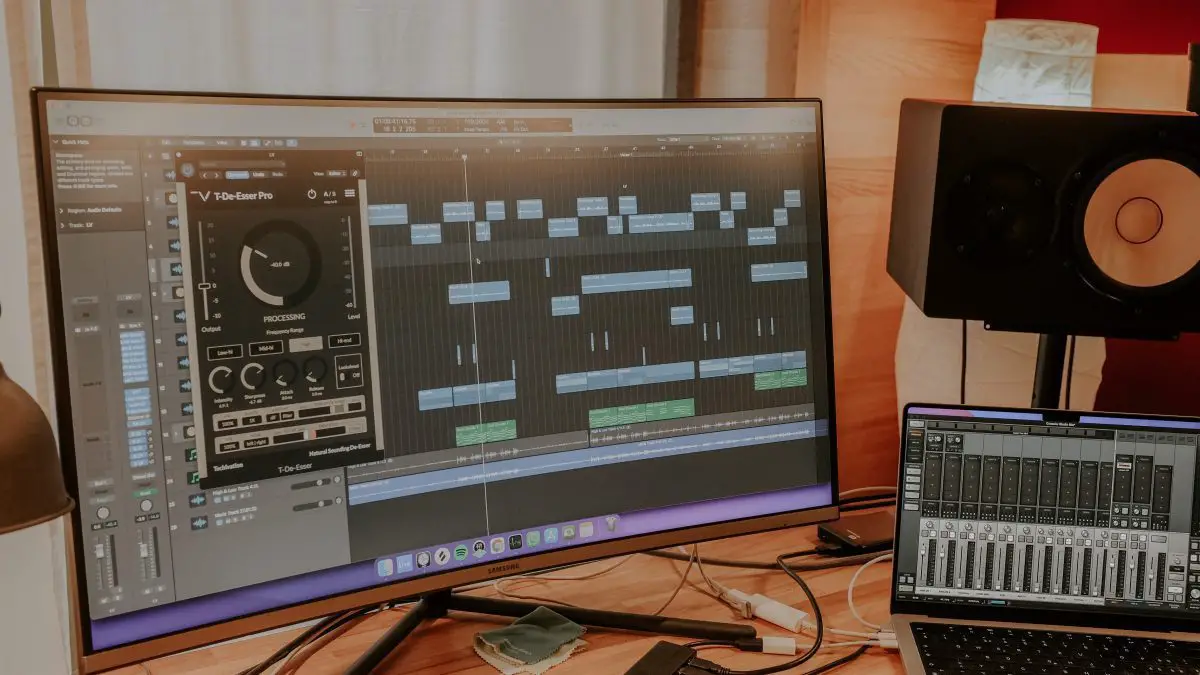
Are you tired of listening to recordings with harsh “s” and “sh” sounds that make you cringe? Well, my friend, you’re in luck because we’re about to dive into the wonderful world of de-essers in audio production.
In this blog post, we’ll cover everything you need to know about de-essers, from the definition and types to advanced techniques. You’ll learn how to use a de-esser to improve the quality of your recordings and avoid common mistakes. And don’t worry if you’re a beginner – we’ve got you covered with our expert tips and best practices.
What is a de-esser in audio? A de-esser is a tool used in audio production to reduce or remove harsh sibilant sounds, such as “s” and “sh,” from vocal or instrumental recordings. It works by detecting and attenuating the specific frequency range associated with these sounds.
What is a de-esser in audio production?
A de-esser is a tool used in audio production to reduce or remove harsh sibilant sounds, such as “s” and “sh,” from vocal or instrumental recordings. Most digital audio workstations (DAWs) include a de-esser, and there are also aftermarket VST plugins available for purchase.

While de-essing is commonly used on vocals, it can also be effective in reducing harshness in instrumental tracks, such as guitar, drums, or overheads. A de-esser plugin works by compressing the audio signal when it detects sibilance, typically within the frequency range of 2-10 kHz.
When using a de-esser, it’s important to avoid overuse, as this can result in unwanted audio artifacts.
In addition to using a de-esser, there are other techniques for reducing sibilance in audio production, such as dynamic EQ or manually EQing the track. However, using a de-esser is generally preferred as it produces a smoother and more natural sound.
When using a de-esser, it’s important to avoid overuse, as this can result in unwanted audio artifacts. It’s also crucial to find the right balance and frequency range for the specific recording, as the optimal settings can vary depending on the vocalist or instrument.
AKAI Professional MPK Mini MK3

AKAI Professional MPK Mini MK3
How to use a de-esser in audio production
We’ll go over how to employ a de-esser in audio production to make your voice and other recordings sound polished and professional, whether you’re a beginner or a seasoned producer. Here is a list of steps for using a de-esser in audio production:
- Identify the most sibilant part. Play the entire track and note down the time stamp of the significant sibilant events. From the list, pick the part that has the most sibilance and set it to loop with your de-esser activated on the track.
- Set the threshold or sensitivity of the de-esser. This is so it only turns on when sibilance is present. Turn up the de-esser’s strength until the vocals’ “s” and “t” sounds are hard to hear, then dial the strength back a little bit. Set the smoothing so the gain reduction sounds natural, usually between 8 and 18 ms.
- Insert a de-esser plugin after EQ and compression. This is to reduce sibilance automatically.
- Manually de-ess the sound. Alternatively, manually de-essing sibilant sounds with gain automation and clip gain can also be done by looking for recognizable “ess” in the waveform, separating the “esses” into their own clip, and reducing the gain of that clip. However, manual de-essing can be time-consuming.
It’s important to remember to find the right balance and frequency range for the specific recording when using a de-esser, as the optimal settings can vary depending on the vocalist or instrument.

What are the methods for de-essing?
De-essing is a common technique used in audio production to reduce or eliminate sibilance in vocal recordings or other audio content. There are several methods to achieve this, ranging from manual techniques to using dedicated de-esser plugins or dynamic EQs. We’ll explore the different methods for de-essing and how to use them effectively.
1. Manual de-essing or dynamic EQ
It is feasible to EQ sibilance out of vocals, although it does not sound as good as a de-esser. For example, you can use a thin bell filter to attenuate the troublesome frequency, which is typically in the 3-10 kHz region.
This, however, will remove that frequency from the entire vocal file, which may make it sound weak or unnatural. Gain automation is required to correct this. Unfortunately, unless you prefer fine-tuning curves throughout the entire track, that may be a time-consuming and mind-numbing procedure.
2. De-esser plugins
By employing de-esser plugins, you can avoid the process of gain automation. The basic function of de-essing plugins is to reduce excessive sibilance in a vocal track. There are several VST plugins available for this purpose, with various numbers of parameters and complexity.
They fundamentally work by detecting when a sibilant frequency reaches a predetermined threshold and reducing the signal’s strength. You can get the task done using any default plugin in all major DAWs or with third-party solutions like FabFilter Pro-DS and Sonnox Oxford SuprEsser V3.
Split-band or wide-band processing is available in de-esser plugins.
Split-band de-essing
Instead of applying gain reduction to the full signal, split-band de-essing divides it into two halves. Once the goal frequency for minimizing sibilance is determined, the signal is separated into frequencies lower than the target frequency and frequencies higher than it.
Just the higher band in this split is compressed now when the sibilant frequencies in the sidechain reach the threshold. This merely affects the objectionable high frequencies and has no effect on the lower frequencies where the vocal’s ‘body’ may be.
Contemporary split-band de-essers frequently include three bands: below, around, and above the intended frequency. This lets you isolate the roughness and reduce it without impacting the remainder of the track.
The width of the sibilant range may be modified in some circumstances. Generally, split-band plugins are better suited for surgical de-essing with less volume variation.
Wide-band de-essing
A wide-band de-esser functions effectively as a sidechain compressor. An external signal triggers its sensing circuit, but the compression is applied to the source signal, which is the sound being attenuated in this case.
The sidechain comprises of the original signal with a gain boost around the frequencies where the harsh sibilance is present to achieve this precise purpose.
It makes the compressor only respond to sibilant frequencies. When the level of these frequencies exceeds the chosen threshold, the compressor reduces the strength of the entire signal.
Wide-band de-essing compresses the entire sound in response to sibilant frequencies. Attack and release periods are critical for avoiding artificial pumping effects that render the vocal inaudible.
Yet, because all frequencies are affected equally, wide-band processing can better preserve the overall timbre of the voice. As a result, wide-band de-essing is more difficult to tune in for extremely specific frequencies but can produce more musical results. Most plugins feature a wide-band processing option as well as split-band approaches.
What are the popular de-esser plugins available?
In the world of audio processing, a de-esser is a key tool for reducing or eliminating harsh sibilant sounds caused by the human voice when pronouncing “s,” “z,” and “sh” sounds. The table below outlines some of the most popular de-esser plugins used in the industry. This comparison includes the developer of the plugin, its key features, and the approximate cost, providing a handy reference for audio engineers and enthusiasts alike.
| De-esser Plugin | Developer | Key Features | Approximate Cost |
|---|---|---|---|
| FabFilter Pro-DS | FabFilter | Single vocal and allround modes, wide band or linear phase split band processing | $179 |
| Waves DeEsser | Waves | Three listening modes, high definition low-frequency processing | $49 |
| Spitfish | Digital Fish Phones | Hard/soft knee, stereo or M/S operation modes, frequency control | Free |
| Eiosis E2Deesser | Eiosis | Simple and advanced operation modes, visual audio displays, two main parameters for quick adjustments | $149 |
| Sonnox Oxford SuprEsser DS | Sonnox | Three listening modes, high definition, low-frequency processing | $115 |
If you want even more tips and insights, watch this video called “What is a De-esser?” from the wickiemedia YouTube channel.
Frequently asked questions (FAQ)
Do you still have questions about what a de-esser is in audio? Below are some of the most commonly asked questions.
What is the purpose of a de-esser in audio production?
De-essers are used to reduce or remove harsh sibilant sounds in vocal or instrumental recordings, which can be distracting and unpleasant to listen to.
Can a de-esser completely remove all sibilance from a recording?
No, a de-esser can only reduce or attenuate sibilant sounds within a specific frequency range. It’s important to use it appropriately and avoid overuse, which can result in unwanted audio artifacts.
How do I know which frequency range to target when using a de-esser?
The frequency range for sibilant sounds typically falls between 2-10 kHz. However, the exact range can vary depending on the recording and individual characteristics of the vocalist or instrument. Experiment with different settings to find the right range for your specific recording.
Conclusion
Well, folks, we’ve reached the end of our journey. I hope you found this article as helpful as I found it enjoyable to write. Now, let me ask you this: Did you learn everything you wanted to know about de-essers in audio production? If not, drop a comment below, and I’ll do my best to answer it.
Remember, using a de-esser is all about finding the right balance – too little, and you’ll be left with harsh sibilant sounds; too much, and you’ll end up with weird audio artifacts. But with the right techniques and best practices, you’ll be able to de-ess your way to audio perfection.
And on that note, I’ll leave you with a pun: Why did the audio engineer break up with his de-esser? Because it was too controlling! (I know, I know, I’ll stick to writing and leave the comedy to the professionals). Thanks for reading, and until next time, keep producing that sweet, sweet audio.
Key takeaways
This article covered what a de-esser is in audio. Here are some key takeaways:
- A de-esser is a tool used in audio production to reduce or remove harsh sibilant sounds, such as “s” and “sh,” from vocal or instrumental recordings.
- Overuse of a de-esser can result in unwanted audio artifacts, so it’s important to use it appropriately.
- The frequency range for sibilant sounds typically falls between 2-10 kHz.
- Setting up a de-esser in a digital audio workstation (DAW) requires some technical knowledge, but there are many resources available to help beginners.
- Best practices for de-essing include setting the threshold and ratio appropriately and using EQ to balance the overall sound.
- Common mistakes to avoid when using a de-esser include choosing the wrong frequency range, overusing the tool, and not using it at all.
- Using a de-esser can greatly improve the quality of your recordings, especially when used in conjunction with other audio production techniques.


