Imagine this: you’re cookin’ up a sick beat, everything’s vibin’, and then you hit play. BAM! It’s like a punch in the face with distortion and ear-splitting loudness. We’ve all been there, right? So, how can you avoid this audio apocalypse? Limiters, my friend! Stick around, and we’ll dive into the nitty-gritty of what a limiter is and how it saves your tracks from entering the distortion danger zone.
What is a limiter in audio? A limiter in audio is a dynamic processing tool that prevents an audio signal from exceeding a specified threshold, ensuring no distortion or clipping occurs and preserving audio quality.
Why is a limiter essential in music production?
A limiter is absolutely crucial in the world of music production. Without it, your tracks could turn into a hot mess of distortion and clipping, making listeners cringe instead of bobbing their heads.

Think of a limiter as the guardian angel for your mix’s dynamics. It swoops in and saves the day whenever your audio threatens to go haywire. For example, if you’ve got a killer drum track with a snare that’s louder than a thunderclap, a limiter will step in and prevent that snare from blowing out eardrums.
And guess what? The magic of limiters doesn’t stop there. They also play a huge role in mastering your tracks, ensuring your music sounds polished and professional. Trust me, even the raddest beat will fall flat if it’s not mastered properly.
To sum it up, limiters are the unsung heroes of music production, working behind the scenes to:
- Prevent distortion and clipping
- Maintain audio quality
- Help with mastering and achieving a polished sound
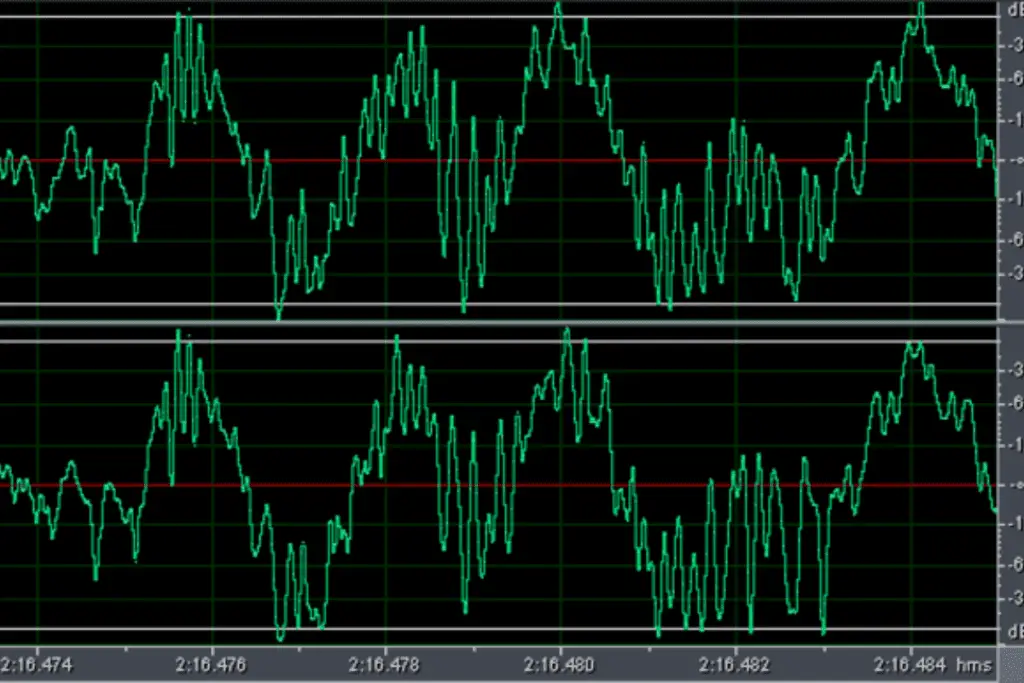
When I first dabbled in music production, I didn’t know much about limiters. I was jamming away, creating a fire beat with some heavy 808s. But when I played it back, my speakers sounded like they were about to explode! The bass was so intense that it made the whole track clip and distort.
After some research, I discovered the power of limiters. I slapped one on the master track, and voilà! The distortion vanished, and my track finally had the clean sound I was looking for. That’s when I realized how essential limiters are for keeping my tracks in check and sounding fresh.
AKAI Professional MPK Mini MK3

AKAI Professional MPK Mini MK3
How does a limiter keep distortion at bay while preserving audio quality?
A limiter works its magic by controlling the dynamic range of your audio, which is the difference between the loudest and softest parts. By setting a threshold, you’re telling the limiter, “Hey, don’t let the volume go past this point, alright?” And like a trusty sidekick, it listens and obeys.
But how exactly does it do that without wrecking your audio quality? Limiters use a process called “gain reduction.” When the volume surpasses the threshold, the limiter steps in and reduces the gain. It does this quickly and smoothly, ensuring no distortion or clipping occurs.
Now, I know what you might be thinking: “Won’t that just squash my audio and make it sound lifeless?” Fear not! Limiters are smart, and they know when to be subtle and when to be aggressive. By using a limiter correctly, you can maintain your audio’s punchiness and energy while keeping those unruly peaks in check.
Here’s a quick example to illustrate the limiter’s magic:
- You’ve got a track with a wild guitar solo that’s way too loud.
- You set a threshold on the limiter to prevent the volume from going overboard.
- The limiter kicks in during the guitar solo, reducing the gain and preventing distortion.
- Your audio quality is preserved, and the guitar solo sits perfectly in the mix.
So, remember, a limiter is your audio’s best friend. It keeps distortion at bay while preserving the quality of your masterpiece.
What are the key parameters to tweak when using a limiter?
To make the most of these dynamic superheroes, you’ve gotta understand the key parameters you can tweak. Let’s break down the main controls you’ll find on most limiters:
1. Threshold
This is the level where the limiter starts working. When your audio surpasses the threshold, the limiter steps in and reduces the gain. Set it too low, and you’ll squash your mix; set it too high, and you won’t tame those unruly peaks. Finding the sweet spot is crucial!
A faster release can create a more transparent sound, while a slower release can make your audio sound smoother and more controlled.
2. Attack
The attack time is how quickly the limiter responds once the audio goes above the threshold. A faster attack clamps down on those peaks instantly, while a slower attack lets some transients through before applying gain reduction. Choose wisely, as it can affect the overall sound and character of your mix.
3. Release
The release time determines how long it takes for the limiter to stop applying gain reduction once the audio falls back below the threshold. A faster release can create a more transparent sound, while a slower release can make your audio sound smoother and more controlled.
4. Output ceiling (or max output)
This parameter sets the absolute maximum output level. It’s like the limiter’s final say, ensuring that your audio won’t go past this level no matter what. Keep it slightly below 0 dB to avoid any potential clipping or distortion, especially when converting to lossy formats like MP3.
Now, let’s put these parameters to work in a real-life example:
- You’ve got a track with a punchy kick drum that’s causing some pesky peaks.
- You set the threshold just below the level where the kick drum peaks.
- You choose a fast attack to quickly catch those peaks and a moderate release to let the limiter recover smoothly.
- Finally, you set the output ceiling at -0.3 dB to ensure no clipping or distortion sneaks in.
Boom! With just a few tweaks, you’ve tamed the beast and made your track sound more polished and professional. Remember, the key is to strike a balance between controlling those peaks and preserving the energy of your mix.
How can you creatively use a limiter for sound design and mixing purposes?
Limiters aren’t just for taming peaks and mastering your tracks. They can also be your secret weapon for creative sound design and mixing. It’s time to let your imagination run wild and push those limiters to, well, their limits!
Ready to unleash your inner audio wizard? Check out these creative ideas for using a limiter:
- Glue your mix together: Apply a limiter on your mix bus or group channels to help “glue” the mix together. By lightly compressing the overall mix, you can create a sense of cohesion and make everything sound more polished.
- Add sustain to drums: Want your drums to pack a bigger punch? Use a limiter with a slow attack and fast release on individual drum channels to emphasize the attack while adding some sustain to the sound.
- Control dynamics for vocals: Got a vocalist with an impressive range? Sometimes, that dynamic range can be a bit too much for a mix. Use a limiter to gently control the dynamics, ensuring the vocals stay present and don’t get lost in the mix.
- Enhance synths and pads: Give your synths and pads some extra sparkle by using a limiter with a slow attack and medium release. This can add warmth, depth, and character to your synth sounds.
Here’s a fun example of using a limiter creatively:
- You’ve got a synth pad that you want to make more lush and vibrant.
- You apply a limiter with a slow attack to emphasize the pad’s attack transient.
- You set the release to medium, allowing the limiter to add some sustain and warmth to the sound.
- You tweak the threshold and output ceiling to taste, ensuring the pad doesn’t overpower the mix.
And there you have it—a synth pad that’s taken to new heights, all thanks to a little creative limiter action!

What are the popular limiter plugins?
The world of limiters is vast, and there’s no shortage of plugins to choose from. To help you make an informed decision, we’ve put together a data table comparing some of the most popular limiter plugins in the market. This table provides a quick overview of their features, price, and supported platforms, so you can find the perfect limiter for your needs.
| Limiter Plugin | Features | Price | Supported Platforms |
|---|---|---|---|
| FabFilter Pro-L 2 | Transparent limiting, True Peak limiting, multiple algorithms | $199 | Windows, macOS |
| iZotope Ozone 9 | All-in-one mastering suite, intelligent limiting, True Peak limiting | $249 | Windows, macOS |
| Waves L2 Ultramaximizer | Transparent limiting, dithering, noise shaping | $299 | Windows, macOS |
| Sonnox Oxford Limiter v3 | Transparent limiting, True Peak limiting, unique Enhance section | £195 | Windows, macOS |
| DMG Audio Limitless | 6-stage signal path, lookahead, True Peak limiting | $249 | Windows, macOS |
Advantages and disadvantages of limiters
As with any audio tool, limiters have their own set of pros and cons. Let’s explore these to help you better understand how and when to use a limiter in your music production process.
Advantages of limiters
Limiter devices offer several benefits that make them indispensable in audio applications:
- Dynamic range control: Limiters excel at managing dynamic range, which is the difference between the softest and loudest parts of an audio signal. They can compress the signal’s dynamic range, reducing the volume of loud passages and boosting the level of quieter sections. This helps maintain a more consistent and balanced sound.
- Protection against clipping: Clipping occurs when an audio signal exceeds the maximum level that a system can handle, resulting in distorted and unpleasant sounds. By imposing an upper limit on the signal’s level, limiters prevent clipping and protect the audio system from damage.
- Increased loudness: Limiters can be employed to increase the overall loudness of an audio signal without introducing distortion. This is particularly useful in broadcasting and music production, where a competitive volume level is often desired.
- Enhanced intelligibility: By taming sudden volume peaks and reducing the dynamic range, limiters can improve the intelligibility of speech and vocals. This is crucial in applications such as public address systems or podcasts, where clear communication is essential.
- Consistent playback experience: Limiters help maintain a consistent volume level across different audio tracks or sources. This ensures that listeners do not experience significant changes in volume when switching between different content, creating a more enjoyable and seamless listening experience.
Disadvantages of limiters
While limiters provide numerous advantages, there are also some downsides to consider:
- Potential loss of dynamics: Limiters can inadvertently squash the dynamics of audio signals if used excessively or incorrectly. This can result in a less natural and more compressed sound, which may not be desirable in certain musical genres or artistic productions.
- Artifacts and pumping: When limiters are pushed too hard, they can introduce unwanted side effects known as artifacts. These artifacts may manifest as audible distortion, pumping (audible level fluctuations), or a loss of transient detail in the audio.
- Challenges with mastering: In audio mastering, where the goal is to optimize the final mix for distribution, the use of limiters must be judicious. Over-reliance on limiters during the mastering process can lead to a loss of clarity, reduced dynamic range, and an overall compromised sonic quality.
- Difficulty in maintaining transparency: Limiters that operate too aggressively or are not well-calibrated can be noticeable to listeners. The audio may sound overly processed or lacking in naturalness, particularly when dealing with delicate material such as classical music or highly dynamic recordings.
- Complexity of settings: Setting up a limiter correctly can be a challenge, especially for those new to audio production. Understanding the various parameters, such as threshold, ratio, attack, and release, requires knowledge and experience to achieve optimal results.
Remember, the key is to strike a balance between controlling your audio levels and preserving the natural energy and dynamics of your mix. Limiters can be powerful tools when used correctly, but it’s essential to understand their pros and cons to make the most of them in your music production journey.
If you want even more tips and insights, watch this video called “What Is a Limiter? | Audio Dynamics 101” from the iZotope, Inc. YouTube channel.
Frequently asked questions (FAQ)
Do you still have questions about what a limiter in audio is? Below are some of the most commonly asked questions.
How does a limiter work?
A limiter works by reducing the amplitude of an audio signal that exceeds a specified threshold. It acts as a “ceiling” for your audio, ensuring that the volume does not go above a certain level, preventing clipping and distortion.
When should I use a limiter in my mix?
A limiter should typically be used during the final stages of the mixing process or during mastering. It can be applied to individual channels, group channels, or the master bus, depending on your specific needs.
Using a limiter on individual channels can help control dynamics while applying it to the mix bus or during mastering ensuring a consistent loudness level across your entire track.
Can a limiter be used for creative purposes?
Yes, a limiter can be used creatively in sound design and mixing. By adjusting the attack and release settings, you can add sustain to drums, control dynamics for vocals, or enhance synths and pads. The key is to experiment and find the right settings that bring out the best in your audio.
Conclusion
Well, we’ve reached the limit of our limiter journey! Now you’re equipped with the knowledge to tame those wild audio peaks and take your music to new heights.
I read and reply to every comment, so don’t hesitate to drop your thoughts or questions below. If this article struck a chord with you, share it with a friend, and explore my full blog for more sound advice on music production. Thanks for reading, and until next time, keep pushing the limits of your creativity!
Key takeaways
This article covered what a limiter is in audio and how it can be used in music production. Here are some key takeaways:
- A limiter prevents audio clipping and distortion by reducing the amplitude of a signal that exceeds a specified threshold.
- Limiters are commonly used during the final stages of mixing or mastering to maintain a consistent loudness level.
- Creative uses of limiters include gluing mixes together, adding sustain to drums, controlling vocal dynamics, and enhancing synths and pads.
- Popular limiter plugins offer various features, prices, and platform support, making it easy to find the perfect limiter for your needs.
- Understanding the advantages and disadvantages of limiters can help you use them effectively in your music production.


