Are your tracks going from whisper to shout in the blink of an eye? Wondering how to keep your audio in check and make it smooth like butter? Let’s explore gain reduction and discover how it can be your secret weapon for achieving that perfect, balanced sound. Let’s dive into the world of gain reduction, where we’ll unlock the secrets to compressors, limiters, and techniques for leveling up your sound design. By the end of this post, you’ll understand the key parameters to consider and how to use gain reduction creatively.
What is gain reduction? Gain reduction refers to the regulation of the amplitude of a signal in order to prevent it from getting too loud or to keep the signal at a relatively uniform level, or both. It’s all about controlling the volume dynamics and maintaining a stable audio experience.
What is gain reduction?
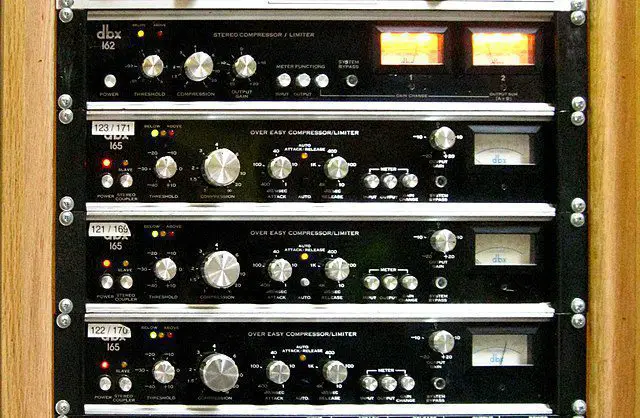
Gain reduction is a function of compressors or limiters in audio production, referring to the regulation of the amplitude of a signal in order to prevent it from getting too loud or to maintain the signal at a relatively uniform level.

It is not a parameter you actively adjust but rather the result of the combined effect of all the parameters set in your compressor, such as threshold and ratio. Gain reduction is essential in the studio when recording and mixing, as it helps maintain control over the elements of your mix and regulate the peaks of your audio signal.
AKAI Professional MPK Mini MK3

AKAI Professional MPK Mini MK3
How does gain reduction work in compressors and limiters?
For example, when compressing drums, you can set a quick attack time and a 6:1 ratio to tighten up a boomy kick drum.
…limiters are compressors with extremely high compression ratios, and the amount of gain reduction applied by a limiter is determined by an output ceiling control set by the user.
A limiter, on the other hand, is more aggressive and does not allow any audio to pass beyond a set ‘ceiling,’ applying brick wall compression to prevent the audio from exceeding the clipping point of 0 dBFS.
Limiters increase perceived loudness by raising the quietest parts of an audio signal while preventing peaks from clipping. Essentially, limiters are compressors with extremely high compression ratios, and the amount of gain reduction applied by a limiter is determined by an output ceiling control set by the user.
Now, let’s dive into the practical side of gain reduction and explore how it applies to real-world scenarios.
- Balancing signal loudness: The purpose of gain reduction is to prevent distortion or clipping that can occur when the signal level gets too high, to make quieter sounds more audible and to generally control the dynamic range of the audio. By taming the peaks and boosting the quieter parts, you can achieve a more balanced and polished sound. This is especially important when working with vocals, instruments, or entire mixes where maintaining consistent loudness is crucial.
- Maintaining uniform levels: Gain reduction helps you ensure a consistent listening experience. It can prevent certain elements from overpowering the mix, allowing every instrument or vocal to find its rightful place. This level of control is essential for achieving a professional-sounding production.
- Controlling dynamics: Sometimes, you may want to intentionally manipulate the dynamics of your audio. Gain reduction empowers you to shape the expressive qualities of a performance. By carefully adjusting the threshold and ratio controls, you can emphasize or tame certain elements to evoke the desired emotional impact.
- Avoiding unwanted pumping effect: When gain reduction is too aggressive, it can lead to an audible “pumping” effect, where the audio breathes unnaturally due to excessive gain reduction. To achieve a stable signal without this undesirable effect, it is recommended to set the maximum gain reduction for signal peaks between 3dB and 6dB. This ensures a controlled sound without sacrificing the natural dynamics.
Gain reduction works in compressors and limiters by regulating the amplitude of an audio signal to prevent it from getting too loud or to maintain a relatively uniform level. In a compressor, once the audio signal surpasses a certain threshold, the compressor reduces the volume gradually, depending on the set ratio.

What is the threshold control?
When it comes to gain reduction, threshold control plays a crucial role. Think of the threshold as a boundary that determines when the gain reduction kicks in. It acts as a reference point, specifying the level at which the compressor or limiter starts reducing the signal’s gain.
When you hit that threshold, the gain reduction comes into play. Adjusting the threshold allows you to decide at what point the gain reduction should kick in, making it an essential control for sculpting your audio.
Key compressor and limiter parameters
The following data table provides an overview of the essential parameters in compressors and limiters, which are crucial in understanding and using gain reduction effectively. This table highlights the main parameters, their functions, and the typical settings you might encounter in audio production.
| Parameter | Function | Typical Compressor Settings | Typical Limiter Settings |
|---|---|---|---|
| Threshold | Level at which the compressor or limiter starts to reduce gain | -20 dB to -10 dB | -0.1 dB to -0.3 dB |
| Ratio | Amount of gain reduction applied to signals exceeding the threshold | 2:1 to 10:1 | ∞:1 (infinite) |
| Attack | Time it takes for the compressor or limiter to react to signal peaks | 1 ms to 100 ms | 0 ms to 10 ms |
| Release | Time it takes for the compressor or limiter to stop reducing gain after the signal drops below the threshold | 50 ms to 500 ms | 50 ms to 500 ms |
| Output Ceiling | Maximum output level allowed in a limiter | N/A | -0.1 dB to -0.3 dB |
How can you use gain reduction creatively for sound design?
Now that we’ve got the basics covered, let’s talk about using gain reduction to enhance your tracks creatively. Gain reduction isn’t just for keeping your mix clean and balanced – it can also be a powerful tool for shaping your sound in unique and exciting ways.
For example, you can use gain reduction to add punch and character to drums, giving them a more aggressive, in-your-face sound.

One way to do this is by using a compressor with a fast attack and release and setting the threshold to only affect the loudest parts of the drum hits. This will create a snappy and energetic effect, making your drums stand out in the mix. Many music producers, including some of the biggest names in the industry, have been known to use gain reduction in this way to create distinctive sounds that set their music apart.
Remember, though, that using gain reduction creatively is about finding the right balance – you don’t want to overdo it and lose the natural dynamics of your audio. Experimenting with different compressor settings and gain reduction techniques will help you find the sweet spot for your tracks and ultimately lead to a more polished and professional sound.
If you want even more tips and insights, watch this video called “Simplifying Vocal Mixing with One Gain Reduction Plugin” from the Joey Sturgis Tones YouTube channel.
Frequently asked questions (FAQ)
Do you still have questions about gain reduction in audio? Below are some of the most commonly asked questions.
What is the main purpose of gain reduction in audio?
Gain reduction is primarily used to regulate the amplitude of an audio signal, preventing it from getting too loud or maintaining a uniform level. This helps in achieving a balanced mix and avoiding distortion or clipping.
How do compressors and limiters use gain reduction differently?
Compressors use gain reduction to gradually reduce the volume of an audio signal once it surpasses a set threshold, depending on the set ratio. Limiters, on the other hand, use gain reduction more aggressively by setting a maximum output ceiling and applying brick wall compression, preventing the audio signal from exceeding the clipping point.
How can I use gain reduction creatively in my audio projects?
Gain reduction can be used creatively to shape the sound of individual elements in your mix, such as adding punch and character to drums. By adjusting compressor settings, such as attack and release times and the threshold, you can create distinctive sounds and give your mix a unique, polished feel.
Can I use gain reduction on every instrument in my mix?
Yes, you can use gain reduction on any instrument in your mix. However, it’s important to use it judiciously and consider the specific needs and dynamics of each instrument. Apply gain reduction selectively to maintain a balanced mix and ensure that the overall sound remains natural and cohesive.
How do I avoid overcompressing my audio?
To avoid overcompression, start by setting the threshold and ratio controls appropriately. It’s important to find the right balance between controlling dynamics and preserving the natural musicality of the audio. Additionally, trust your ears and listen attentively to the changes introduced by gain reduction. If your audio starts to sound lifeless or lacks dynamics, dial back the compression settings and find a more subtle approach.
Can gain reduction be used in live sound situations?
Absolutely! Gain reduction techniques can be employed in live sound situations, such as concerts or events. Compressors and limiters are commonly used to control dynamics, ensure consistent levels, and prevent audio clipping. However, it’s essential to adjust the settings according to the specific venue, performance, and equipment to achieve optimal results.
Conclusion
Well, we’ve reached the end of our dynamic journey exploring gain reduction in audio. It’s safe to say we’ve compressed quite a bit of information into this post!
So, did our deep dive into gain reduction help you grasp the concept better? And did I cover everything you wanted to know? Let me know in the comments section below – I read and reply to every comment. If you found this article helpful, share it with a friend, and check out my full blog for more tips and tricks on audio production. Thanks for reading, and keep making those sound waves behave!
Key takeaways
This article covered gain reduction in audio. Here are some key takeaways:
- Gain reduction is the regulation of the amplitude of an audio signal to prevent it from getting too loud or maintaining a relatively uniform level.
- Compressors and limiters are the primary tools for applying a gain reduction in audio production.
- Compressors work with a variable ratio to reduce gain, while limiters have an infinite ratio and an output ceiling to prevent clipping.
- Gain reduction can be used to shape the sound of individual elements in a mix, adding character and polish.
- The threshold and ratio controls are fundamental to the process of gain reduction.
- Gain reduction can be applied to various elements in a mix, such as vocals, instruments, and the overall mix.
- Proper use of gain reduction ensures controlled dynamics, consistent levels, and enhanced clarity.
- Experimentation, attentive listening, and trust in your ears are essential to master gain reduction techniques.


